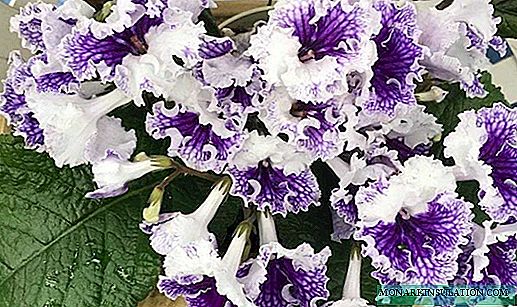
The appearance of indoor violet in the house causes a desire to decorate all window sills with this plant. Growing a violet or, as it is also called, Saintpaulia is a simple process even for a beginner grower. One has only to deal with the question of how to propagate the violet and provide it with suitable conditions.
General information about the plant and its propagation methods
Violet is a short perennial with a short stem and pubescent leaves. Leaves grow in the shape of a rosette. Place of natural growth - all regions of Africa. The species belongs to the Gesneriev family.

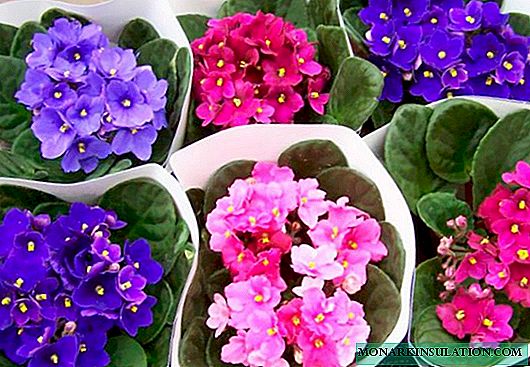
Varieties of violets
Propagation of violets is carried out in several ways:
- The fastest - breeding with the help of a whole leaf or part thereof.
- Seed method.
- Method of rooting a peduncle.
- Stepsons or cuttings.
To select a specific method, it is advisable to study each in detail.
How to grow a violet from a leaf at home
It can be bred in this way in water or immediately in the ground. It is important to approach all stages of landing as responsibly as possible.
Leaf selection and preparation for germination
Before rooting a violet from a leaf, you must choose it correctly. The result directly depends on the quality of planting material. Violets propagate from both the lower and middle rows of leaves. A good seedling should be painted in a natural color and free from damage and stains.
Note! Strongly do not recommend growing violets from old leaves.
A pre-selected leaf is separated from the bush. Often they simply pinch it off the mother plant. Use a sanitized sharp knife or a special pruner. Performing an oblique cut does less damage to the plant. It is important not to cut off near the main stem, but to leave a small lump.
The place of cut on the planting material and on the violet itself is necessarily treated with charcoal. To obtain the best result, preliminary soaking is carried out in a weak solution of potassium permanganate. The procedure does not exceed 2-3 hours.
Optimal conditions for germination
Germination should be carried out under the right conditions: the shade and constant room temperature in the range of 20-22 ℃ above zero. For leaf propagation, a wick watering method is used. This will not only protect the flower from unwanted liquid, but will also help the violet to grow and plant buds much faster.
Additional Information! For irrigation use only boiled water, previously cooled to room temperature.
Work steps step by step
It is necessary to determine in which environment rooting will occur. Florists use water or soil for these purposes. Mandatory disinfection procedure. To do this, a tablet of activated carbon is bred in a glass where the sheet will take root. Propagation of violets with a leaf at home step by step:
- For each handle, glass or plastic containers are prepared.
- The water level should not exceed one centimeter.
- The process does not require a change of water. The main thing is to periodically add water; one must not allow complete drying out.
- Perhaps the manifestation of the initial stage of decay of the lower part of the handle. To save planting material, the decayed part is cut off and sprinkled with charcoal. In this case, water is replaced.

Rooting in water
The first root will appear within 1 week. After root formation, the seedling is transplanted into a pot. The immature plant is planted in a small container, this helps the violet to develop evenly.
The propagation algorithm of violets in the soil:
- Planted directly in the ground in small plastic cups or pots.
- Provide drainage. Foam or crushed expanded clay is perfect for these purposes.
- The ground for violets is light and loose.
- Planting of the cuttings is carried out immediately in the soil mixture to a depth of 1-1.5 cm.
- Watered directly under the root as the topsoil dries.

Rooting in the ground
On a note! The only negative is that it is impossible to trace when the first roots begin to appear. The rooting period is significantly reduced.
Follow-up care
Immediately after transplantation, the leaflet will look wilted - this is a normal phenomenon that occurs due to the stress of violets. How to propagate leaflets? The leaf plate is noticeably compacted immediately after the appearance of the first roots. Moderate watering is carried out no more than once a week. Fertilizing is highly undesirable. Top dressing will not allow the root system to develop.
Propagation by leaf fragment
This method is used for rare species or in case of damage to the sheet plate. In order for the disease not to begin further spread, the leaflet is removed. All rotten areas are removed, and a healthy piece can be planted.
Leaf selection and preparation for germination
For propagation, a horizontal cut is performed on the top of the sheet. Before planting, the resulting material is left for 10-15 minutes in the air to stop the juice and the cut is treated with charcoal.
Optimal conditions for germination
For quick rooting use a "breathing" substrate. The room temperature should be maintained in the range of 22-25 ℃. Lighting plantings within 12 hours is a prerequisite for high-quality planting material.
Work steps step by step
You need to plant part of the sheet in light perlite soil. The slice is deepened by 1-1.5 cm. To maintain the necessary humidity, the container with the landing is covered with polyethylene or glass. The method allows you to quickly get a large amount of planting material, from which then many seedlings will grow.
Note! The growth of the baby comes from each vein of a leaf of violet.
Follow-up care
Landing care consists in timely watering and creating the most comfortable conditions. Non-observance of the temperature regime can lead to falling of inflorescences, and further to decay of the species.
Propagation by stepsons
Despite the fact that the propagation of violets is recognized as the most effective method of propagation, it is not suitable for all varieties of culture. For some species, for example, for chimeras, the use of this method will lead to the loss of individual qualities. Therefore, the violet is used for herding.
What should be the stepson
Transplantation is subject to side stepsons, which were formed in the axils of the flower. The length of the planting material should be at least 3 cm.

Herring violets
Optimal conditions for germination
The most acceptable temperature for germination of this species is from +18 to +20 ℃. Due to such requirements, many gardeners often have problems with caring for seedlings. The plant can survive only a one-time drop in temperature to +12 12. It is important not to forget that the violet is a heat-loving plant and in the winter period takes on a "tired" look. In winter, it is advisable to transfer the flower to the northern or western windowsill.
Work steps step by step
For rooting, children use water or a light substrate. The development of the stepson in the water occurs in stages:
- Manganese is added to a dark glass container for disinfection.
- The baby is lowered into purified water. It is enough to pour 1 cm of liquid.
- As in the case of rooting by leaflets, they monitor the water level, preventing the evaporation of moisture.
- A transplant into the ground is carried out only when the radicular socket reaches 8-10 cm.
For rooting directly into the ground, only a breathable, light soil mixture is used. Working material - vermiculite without adding earth.
Additional Information! Do not crush the ground, this can damage the base of the stepson.
To accelerate the rooting process, a greenhouse climate is created for the future violet - they cover the container with a bag or any other transparent material. Daily ventilation is essential.
Follow-up care
Due to the fact that the stepson is initially a more developed planting material, caring for it will not be difficult. The main requirement is to maintain a normal level of illumination for 12-14 hours. In the first days after planting, the room temperature must be maintained in the region of +18 ℃. After rooting, it must be raised to +25 ℃.
Interesting information! Wick watering has proven itself perfectly. It allows you to normalize the "supply" of water to a flower without harming the leaves.

Wick watering method
Peduncle propagation
To preserve the species, a method for breeding peduncles is used. Apply a fully bloomed or only faded plant.

Peduncle propagation
Germination Features
The method is mainly used in cases where it is required to preserve varietal features of the species. Before planting, the sections are disinfected.
Optimal conditions for germination
For germination using peduncles create increased humidity in the room. A container with a lid is suitable for these purposes. As a soil, a mixture of sphagnum and perlite is used.
Work steps step by step
Gardeners do not recommend using unblown buds. Germination process consists in the following activities:
- Cut the peduncle. The procedure is carried out only with a pre-processed tool: scissors, a blade.
- Landing is carried out in moss or sphagnum.
- The planted material is covered with any transparent material.
- When the rooting process is completed, when new rosettes form on the planting material.
- After that, transplant into a pot.
Follow-up care
The appearance of young leaves on the seedling means the successful completion of the process. During rooting and building green mass, the plant creates the most comfortable conditions:
- daylight hours at least 12 hours;
- required room temperature from +20 to +22 ℃;
- watering as the topsoil dries.
They wait until the basal rosette has developed sufficiently, and begin to transplant the violets into a permanent place.
Seed cultivation
The most difficult method of reproduction. Two flowering plants are chosen. Manually pollen is collected from the peduncles of one of them and the pollination of another flower is carried out. After about 4-6 months, seed bolls will mature.
On a note! To understand that the seed is ready, you can completely dried seed boxes.
What cultivable seeds look like
Self-assembled planting material is the key to quality growth in the future. If it is not possible to carry out the procedure yourself, you should be as responsible as possible about the choice of purchased seed.

Healthy seed
Not recommended to purchase seeds from dubious sellers. Buying in a specialized store or at a flower exhibition will give confidence in quality.
How to prepare seeds for planting in the soil
Before sowing seeds in the soil, pre-planting activities are carried out:
- just collected seeds for 2 days, dried in room conditions;
- for disinfection, they are soaked for 30-50 minutes in a weak solution of manganese;
- the next stage is drying the seed.
Additional Information! For sowing, it is better to use special containers filled with perlite. Due to the fact that the seeds of the species are very small, it is recommended to mix them with sand.
Landing is performed in a superficial way. Subsequently, a container with seeds is sprayed from a finely divided spray gun.
Optimal conditions for seed germination
For normal development, the container with landings is covered with glass. Illumination with fluorescent lamps is carried out for 10-12 hours daily. To avoid decay or acidification of the soil, ventilate the plantings daily.
When the substrate dries, the seeds may not rise at all. You can remove the glass only after the first leaves of the seedlings appear.
Rules for caring for young sprouts
Transplantation into individual containers is carried out at the moment when the violet sprouts reach 1-2 cm. During the period of active formation, the most illuminated growing conditions are created.

Germinated Violet Seeds
Note! Avoid direct sunlight. The room temperature should be maintained in the range of 16-18 ℃ above zero.
Selection of materials for planting
Not only high-quality seed is the key to an excellent result. It is important to take the choice of containers for landing and the quality of the soil as seriously as possible.
Soil characteristics
There is a huge variety of purchased primers designed for violets. Specialized stores carry out careful quality control of goods. If it is not possible to purchase a finished substrate, you can prepare the soil for planting yourself. To do this, peat, river sand, leafy residues, perlite or special moss are mixed in equal proportions.
Water characteristics
For irrigation use only warm water, previously settled for 2 days. Regular watering is a prerequisite for the healthy development of a flower.

Proper watering seedlings
Capacities
The root system of the senpolia is very small, so it is not recommended to use large containers. For a young flower, it is best to use plastic cups or shipping pots. An adult plant will categorically react to a large pot - it stops developing.
Common breeding errors
To get the desired result, the main thing is not only to choose high-quality planting material, but also to create the right conditions for rooting. Failure to comply with the rules of reproduction and further care often leads to the invasion of harmful parasites. Due to elevated temperatures, red ticks may start. When they appear, it is urgent to treat the violets with insecticidal agents.

Saintpaulia blooming
Performing a number of simple events, for a fairly short period, you can get a whole flower gallery from one flower. She will not only delight with her appearance, but will also cheer up and purify the air in the house.